 Arc Raiders
ARC Raiders Build Guide: The Versatile Raider Loadout
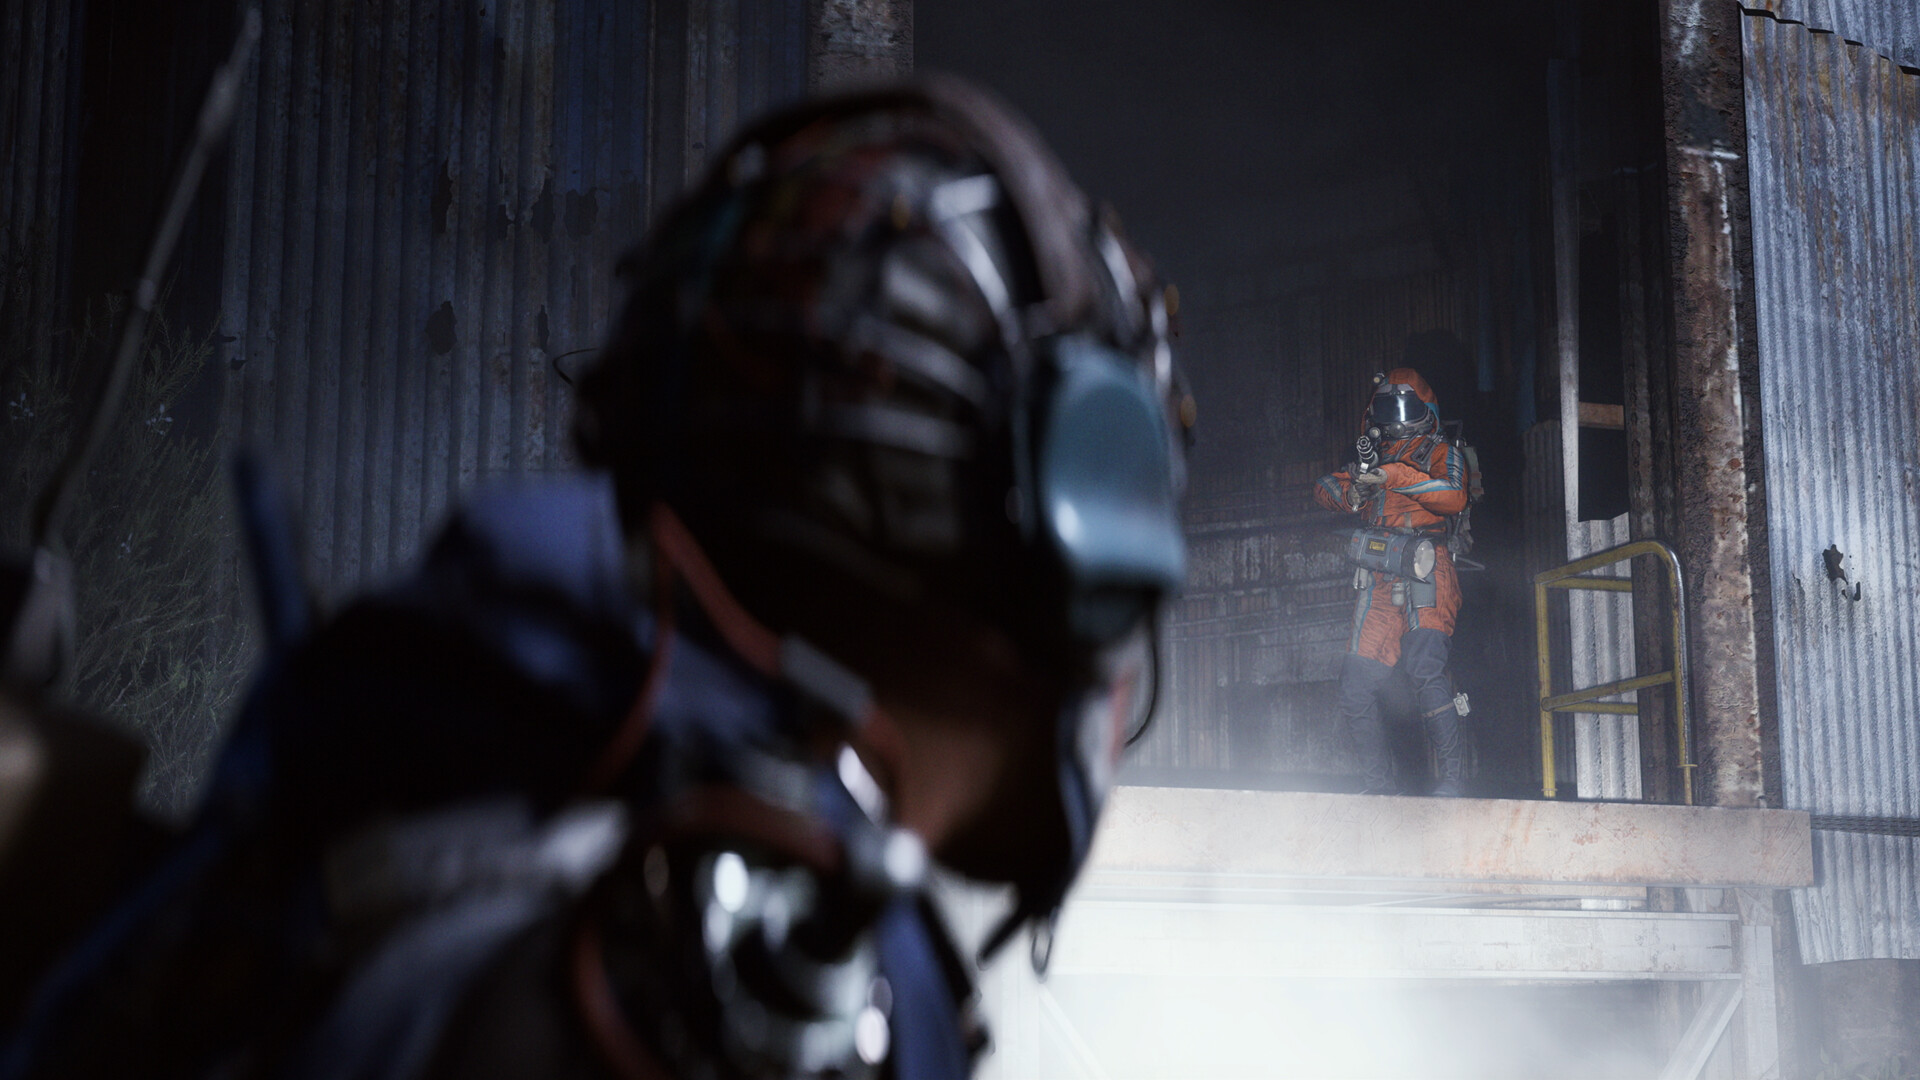
Quick Answer: This arc raiders build guide recommends a flexible mid-range Raider setup focused on mobility, reliable damage, quiet looting, and fast extraction instead of chasing every fight or committing to one narrow weapon style.
Build Identity
This build is a mobile all-rounder designed to survive uncertain encounters, pressure hostile Raiders, and leave with valuable loot before a winning fight turns into a costly wipe.
ARC Raiders is a multiplayer extraction adventure set on a dangerous future Earth threatened by the mechanized ARC, so every loadout has to answer two problems: dealing with machines and surviving other players. The best general-purpose setup is not built around maximum damage in a perfect duel. It is built around having enough flexibility to handle a patrol, a third-party attack, a bad rotation, or an extraction fight without immediately running out of options. The official Steam description identifies the game as an extraction adventure against ARC, which is why this guide treats survival and extraction as equal to combat.
The recommended playstyle sits between a dedicated sniper and a reckless close-range brawler. You want to fight from useful cover, rotate before the enemy fully understands your position, and take engagements that improve your route rather than simply increasing your elimination count. A successful run might include clearing a machine near a loot route, catching another Raider crossing open ground, disengaging from a noisy squad, and reaching extraction with enough healing and ammunition to survive the final approach.
This identity works especially well for solo players and small groups. ARC Raiders supports solo play and teams of two or three, so the build has to function when nobody is available to rescue a bad push or carry an extra utility item. In a duo, one player can lean slightly more aggressively while the all-rounder provides cover, information, and emergency pressure. In a trio, the build becomes the flexible third slot that can swap between scouting, support, and damage depending on what the squad finds.
The core rules are simple:
- Prefer controlled fights over loud, extended battles.
- Keep one option for close range and one option for medium range.
- Carry utility that creates movement opportunities, not just extra damage.
- Preserve enough healing and ammunition for the extraction phase.
- Treat ARC activity as part of the fight rather than background scenery.
- Leave when your inventory is valuable and your remaining resources are thin.
This is a strong starting point for players still learning the maps, weapon handling, and extraction rhythm. It also remains useful after you understand the game because it does not rely on one highly specialized trick. The build asks you to make good decisions, but it gives you enough tools to recover when the match gets messy. That is often more valuable than a loadout that looks impressive on paper and collapses the moment two threats arrive from different angles.
Attribute Priorities
Prioritize mobility first, survivability second, utility third, and raw damage last because a dead Raider cannot benefit from a stronger weapon.
The exact value of each attribute depends on your unlocked skill choices and preferred weapons, but the order below fits the flexible identity of this build. Mobility improves your ability to choose engagements, while defensive and utility investment gives you more chances to survive mistakes. Damage remains important, but it is usually easier to gain damage from weapon selection, positioning, and a clean opening than from forcing every build decision toward offense.
- Mobility: Prioritize movement options that help you cross exposed ground, break line of sight, reposition after firing, and reach extraction with less hesitation. Examples include moving between hard cover after a loud shot, escaping a machine patrol that has boxed you in, and changing elevation when another Raider has your angle.
- Stamina and movement efficiency: Fights often turn on who can sprint, slide, climb, or reposition one more time. Efficient movement helps during a retreat from a bad engagement, a rotation around a building, or a final dash to extraction.
- Health and survivability: Defensive attributes make chip damage less punishing and give you more room to survive unexpected ARC pressure. They are especially useful when solo, because a small mistake cannot be covered by a teammate.
- Healing efficiency or recovery support: Recovery-focused investment keeps a single encounter from consuming the supplies needed for the rest of the raid. It also makes short resets between fights more practical.
- Utility capacity and gadget flexibility: More useful utility gives you ways to deny an angle, create distance, or safely investigate a suspicious area. This is valuable when fighting both machines and human opponents.
- Weapon handling: Handling becomes more important if you use heavier weapons or frequently swap between a primary and secondary. Faster, cleaner weapon transitions can decide a close-range surprise encounter.
- Raw weapon damage: Damage is worth taking once the build already moves well and survives contact. Do not sacrifice every defensive option just to make an ideal hit slightly more rewarding.
Think of these priorities as a decision filter rather than a rigid formula. If your weapon already handles quickly, mobility and survivability deserve more attention. If your kit feels slow and awkward, handling may temporarily move above utility. If you are dying while carrying good loot, defensive investment is probably more valuable than squeezing out another offensive upgrade.
| Priority | What it improves | Best use case |
|---|---|---|
| Mobility | Rotations, escapes, angle changes | Solo play and open terrain |
| Stamina efficiency | Sprinting, sliding, climbing, retreats | Extraction approaches |
| Survivability | Error tolerance and recovery windows | Machine pressure or third parties |
| Utility | Information, cover, denial, disengagement | Duo and trio coordination |
| Handling | Swaps, ready speed, close-range response | Mixed weapon loadouts |
| Damage | Faster eliminations when openings appear | Confident endgame fights |
A simple test helps identify what to improve next. After a failed raid, ask whether you lost because you could not damage the enemy quickly enough or because you could not reach cover, escape, heal, or rotate. Most developing players discover that the second category causes more deaths. Build around the failure you actually experience, not the one that looks most dramatic in a highlight clip.
You might also like
- ARC Raiders Tier List PvP: Best Weapons for Player Fights
- ARC Raiders Tier List Weapons: Best Guns for PvE and PvP
- ARC Raiders Riven Tides Update Patch Notes Explained
- ARC Raiders arc raiders building a library Build Guide
- ARC Raiders update new map: Hotfix 1.36.1 Explained
Skill And Ability Priority
Use movement and information abilities before damage abilities, then spend offensive tools only after an enemy commits to an angle.
Because ARC Raiders encounters can involve machines, solo Raiders, and small teams, ability priority should be based on opportunity creation. An ability that helps you relocate or understand a threat often creates more practical value than one that merely adds damage to a fight you should not have started. Save your strongest emergency tool for the moment when it changes the outcome, not for the first target you see.
| Priority | Ability purpose | When to use it |
|---|---|---|
| 1 | Movement or escape | When crossing a dangerous gap, breaking an enemy angle, or reaching extraction cover |
| 2 | Information or detection | Before opening a contested area, entering a building, or looting after combat |
| 3 | Defensive cover or denial | When holding a revive, healing, crossing, or narrow doorway |
| 4 | Crowd control or disruption | When an enemy squad is grouped or a machine blocks your route |
| 5 | Direct damage | After you have a clean angle and a safe follow-up position |
| 6 | Finishing tool | When an opponent is isolated, exposed, or already committed |
A reliable rotation looks like this:
- Read the situation before spending anything. Identify whether the sound comes from ARC activity, another Raider, or both. Check nearby cover and decide where you will retreat if the first exchange goes badly.
- Use information before contact. Gather enough information to avoid walking into a stacked team or an active machine patrol. You do not need perfect certainty; you need a safer first decision.
- Take the first shot from a position with a second position nearby. Do not begin a fight from the middle of a street, roofline, or open extraction approach unless the reward is worth the exposure.
- Apply pressure, then move. After a loud attack, assume the enemy has a rough idea of your location. Rotate before they can turn your firing position into a predictable trap.
- Use defensive utility during the reset. Heal, reload, and check your next route behind cover. A reset is part of the ability cycle, not dead time.
- Re-engage only if the new angle is better. If the enemy has stronger cover or more teammates than you expected, disengage and preserve the run.
- Use offensive abilities to finish a committed target. Damage tools are strongest when the enemy is already busy healing, fighting ARC, crossing a gap, or protecting a teammate.
In a duo, call abilities by purpose rather than vague instructions. “Cover the retreat” gives your partner a usable action, while “use your thing” creates confusion at exactly the wrong moment. In a trio, avoid stacking every defensive tool on the same piece of cover. One player should hold the current angle, one should prepare the next rotation, and one should watch for a third party.
The most important habit is cooldown discipline. If you spend your escape ability to move slightly faster through a safe area, you may not have it when an enemy appears during extraction. If you use information utility on an uncontested loot room, you may enter the next high-risk location blind. Abilities are strongest when they remove uncertainty or preserve options.
Gear And Loadout
The ideal loadout combines a controllable primary weapon, a close-range backup, healing, and utility that supports repositioning or information gathering.
Weapon names and availability can vary with the current balance environment, so treat the examples below as role recommendations. The purpose is to maintain a dependable combat loop without turning the backpack into a pile of items you never use. A good loadout should have a clear answer for three moments: opening an engagement, surviving pressure, and leaving the area.
| Slot | Item or role | Reason |
|---|---|---|
| Primary weapon | Accurate automatic rifle or stable mid-range weapon | Handles common open-ground and building-edge engagements |
| Secondary weapon | Shotgun, compact automatic weapon, or dependable close-range option | Protects against sudden pushes and tight interiors |
| Healing slot | Fast, reliable healing item | Lets you reset after chip damage before another squad arrives |
| Defensive utility | Cover, barrier, or area-denial option | Creates a safer reload, heal, revive, or crossing window |
| Information utility | Scanner, detection tool, or sound-based information option | Helps identify threats before committing to a room or route |
| Mobility utility | Grapple, movement tool, or escape-focused option | Opens alternate routes and prevents predictable retreats |
| Ammunition | Enough for the planned route, with room for loot | Prevents overloading while preserving combat readiness |
| Backpack space | Open slots reserved for valuable finds | Keeps the extraction objective visible throughout the raid |
For the primary weapon, choose controllability over theoretical maximum damage. A stable weapon helps you punish enemies crossing between cover, damage a Raider who is distracted by ARC, and defend an extraction route without constantly wrestling the recoil. It also makes the build more forgiving when playing on a controller or when fighting from awkward cover.
The secondary should cover the primary weapon’s weakness. A close-range backup is useful when an enemy pushes through a doorway, climbs into your position, or catches you while looting. A compact automatic option gives you a little more flexibility during a medium-distance retreat, while a shotgun can be better when the fight is likely to happen inside a cramped structure. Avoid taking two weapons that solve the same distance problem unless you have a specific team strategy.
Healing should be easy to reach and used proactively. Entering a second fight with a nearly empty health bar creates a chain of bad choices: you must heal in danger, retreat while vulnerable, or gamble on a low-health duel. After a fight, move behind cover, reload, heal, and listen before touching the defeated player’s loot. The backpack is never worth more than the next thirty seconds of survival.
Utility deserves a little more attention than new players usually give it. Defensive equipment can protect a revive, block a predictable doorway, or buy time while a teammate rotates. Information tools can reveal whether a seemingly quiet building is safe enough to enter. Mobility tools can turn a dead-end route into a climbable escape or let you leave a machine’s attack pattern without sprinting through open ground.
A few practical loadout patterns work well:
- Solo balanced setup: stable primary, close-range secondary, healing, information utility, and one escape tool.
- Duo support setup: stable primary, flexible secondary, extra defensive utility, healing, and a movement tool for covering rotations.
- Trio pressure setup: mid-range primary, close-range backup, offensive utility, defensive utility, and enough healing to survive repeated trades.
- Low-risk loot setup: cheaper primary, reliable secondary, basic healing, and utility focused on leaving fights rather than extending them.
Avoid carrying rare or expensive equipment just because you found it. Your loadout should serve the run’s goal. A loot-focused raid needs space and quiet movement. A contested objective needs more ammunition and stronger recovery tools. A late extraction requires enough utility to cross the final danger zone. The same weapon can be correct in one situation and wasteful in another.
Counters And Hard Matchups
The biggest counters to this build are coordinated close-range pushes, long sightline control, resource denial, and fights that attract multiple ARC threats.
The all-rounder is deliberately difficult to hard-counter, but flexibility is not the same as superiority. Specialized loadouts can outperform it when the battlefield strongly favors their preferred range or when the enemy squad coordinates better. Your response should be adaptation, not stubbornly forcing the original plan.
| Hard matchup | Why it is dangerous | Adaptation |
|---|---|---|
| Coordinated close-range duo | They can collapse on your cover before you finish one target | Back through prepared cover, use defensive utility, and split their approach |
| Dedicated long-range player | They punish open rotations and slow looting | Move between hard cover, avoid predictable peeks, and close distance through buildings |
| Machine pressure during a PvP fight | ARC attention can expose your position or deny a retreat | Break contact, change elevation, and let the machine disrupt the fight |
| Third-party squad | Your healing, ammunition, and utility may already be depleted | Loot quickly, relocate immediately, and avoid re-peeking the same angle |
| Defensive hold in a strong building | A patient team can make every approach expensive | Rotate around the structure or leave rather than feeding repeated entries |
| Better-equipped opponent | Direct trades may favor their gear and resources | Use terrain, timing, and disengagement instead of accepting a clean duel |
Close-range rushers are the most obvious threat. They want to remove the distance that gives your primary weapon value. Do not wait for them to reach your cover before deciding what to do. Listen for their approach, keep the secondary ready near likely entry points, and maintain a retreat route that does not lead into a dead end. If you are solo, avoid fighting from a room with only one exit unless the enemy is already committed and vulnerable.
Long-range players punish impatience. Crossing the same open space twice, peeking the same window repeatedly, or standing still to loot after a loud exchange makes your movement easy to read. Break line of sight, use irregular timing, and take routes that offer several pieces of cover. You do not have to win the sniper duel. You only need to stop giving the sniper clean shots.
ARC pressure creates a different problem because it can change the geometry of an encounter. A machine may deny a doorway, force you off a roof, or make noise that hides another Raider’s approach. When human and machine threats overlap, prioritize the threat that controls your next movement. Sometimes that means ignoring a damaged player to leave the machine’s attack area. Sometimes it means finishing the player quickly before the machine turns the fight into a three-way disaster.
A strong adaptation checklist is:
- Do I have a safe retreat route?
- Is my current cover still useful from the enemy’s likely angle?
- Can I heal and reload before another contact?
- Is the enemy alone, or am I assuming that without evidence?
- Is the loot worth the ammunition and utility this fight will cost?
- Can I reach extraction without repeating the same exposed rotation?
The correct answer is often to disengage. Extraction shooters reward completed runs, not only eliminations. The game’s long-term progression also gives you many opportunities to fight later; there is no requirement to turn every distant sound into a personal appointment.
Budget And Endgame Variants
The budget version uses replaceable equipment and conservative routes, while the endgame version invests in consistency, faster recovery, and stronger options for contested extractions.
A starter loadout should be cheap enough that losing it does not change your mood for the next three raids. Its job is to teach the build’s decision-making: fight from cover, preserve utility, rotate after contact, and extract with something useful. Expensive equipment cannot compensate for poor timing, and using premium gear too early can make experimentation feel unnecessarily punishing.
| Build stage | Primary choice | Secondary choice | Utility focus | Main objective |
|---|---|---|---|---|
| Budget starter | Common controllable rifle or similar stable weapon | Basic close-range weapon | One defensive tool and one escape or information tool | Learn routes and extract consistently |
| Developing setup | Better-handling rifle with dependable ammunition access | Flexible compact weapon or shotgun | Healing plus utility for repositioning | Take selective PvP fights |
| Endgame all-rounder | Best comfortable mid-range weapon available | High-confidence close-range backup | Layered defensive, information, and mobility options | Survive contested objectives and extraction |
| Team support variant | Accurate weapon for holding lanes | Close-range protection | Extra cover, detection, or rescue utility | Create safe rotations for the squad |
| Solo risk-control variant | Low-recoil primary | Fast-response secondary | Maximum escape and information support | Avoid being trapped or third-partied |
For the budget version, use common weapons that you can replace without interrupting your progression. Pick ammunition that is easy to maintain, keep the backpack light, and avoid carrying several expensive utility items into a raid whose purpose is simply learning the map. Your first goal is not to defeat every player. It is to finish enough runs that you understand where fights usually happen and how extraction pressure changes the route.
A cheap substitute should preserve the role, not the exact name. If you cannot afford the ideal primary, use another weapon that remains controllable at the distances you expect. If your preferred secondary is unavailable, choose the most dependable close-range option you can operate under pressure. If advanced information utility is scarce, play more slowly around sound, cover, and visible movement. The build still works; it simply asks for better observation.
The developing version is where the build starts feeling complete. You can invest in better handling, more reliable healing, and utility that supports a planned route. At this stage, begin tailoring the loadout to the raid rather than taking the same items every time. A loot run may need more space and less ammunition. A contested objective may justify additional defensive equipment. A duo should divide utility rather than duplicating every item.
The endgame version should improve consistency instead of encouraging reckless aggression. Use the strongest weapon you control comfortably, not merely the one with the highest reputation. A familiar weapon can outperform a theoretically superior option when it lets you land shots, swap quickly, and maintain a retreat. Premium utility is most valuable when it protects a high-value extraction, a revive, or a carefully chosen ambush.
The progression path can stay simple:
- Start with the cheapest stable primary you can use confidently.
- Add a close-range backup before upgrading cosmetic or luxury gear.
- Upgrade healing and movement tools when failed raids show that recovery is the problem.
- Invest in information utility when you frequently enter bad fights.
- Move into expensive equipment only when your routes and extraction habits are reliable.
ARC Raiders has enough content to support a long learning curve. HowLongToBeat lists roughly 38.43 hours for the main story and 73.74 hours with extras, so a sustainable build matters across more than a handful of successful drops Source. Build for repeatable runs, not one spectacular raid that leaves your stash empty.
Common Mistakes
The most common mistakes are overcommitting to fights, carrying the wrong range profile, and treating extraction as an afterthought.
Mistake 1: Taking every audible fight
Players hear gunfire and assume it is a free opportunity, but the original fight may already be attracting another team or ARC pressure. The fix is to approach from cover, observe before firing, and leave if you cannot identify a safe first target.
Mistake 2: Using all utility during the opening exchange
It is tempting to throw every gadget as soon as contact begins, especially when an enemy surprises you. Players fall into this habit because early pressure feels safer than waiting. Keep one defensive or movement option for the retreat, heal, or extraction approach.
Mistake 3: Carrying two weapons for the same distance
A mid-range weapon paired with another mid-range weapon can feel comfortable until somebody pushes into the building. The fix is to give each weapon a distinct job, such as lane control for the primary and close-range defense for the secondary.
Mistake 4: Re-peeking the same angle
A first peek may reveal useful information, but repeating it lets the enemy pre-aim your return. This happens because players want to confirm damage or finish a target. Relocate after the first exchange, even if the new angle is less convenient.
Mistake 5: Healing only after reaching critical health
Waiting too long turns a manageable reset into an emergency. Players often want to keep pressure on a damaged opponent. Heal when you have created a safe window, then re-engage from a better position instead of gambling on a low-health duel.
Mistake 6: Looting before checking the area
Defeating one Raider does not mean the area is safe. The fight may have been visible from a nearby route, and ARC activity can mask approaching footsteps. Secure the immediate area, reload, listen, and loot only when you have a workable escape path.
Mistake 7: Entering extraction with no utility
Some players spend everything on the final fight and then arrive at extraction unable to cross a dangerous lane. The workaround is to reserve one movement or defensive option for the last rotation, even when the backpack is already full.
Mistake 8: Refusing to downgrade gear
A high-value loadout can make players afraid to disengage because they want to “get their money’s worth.” Use cheaper substitutes while learning unfamiliar routes, and only bring premium equipment when the objective justifies the risk.
Mistake 9: Ignoring the squad’s range balance
A trio made entirely of close-range weapons may dominate a room but struggle to cross open ground. A team of only long-range weapons may lack the tools to defend a doorway. Fix the problem during the loadout screen by assigning different engagement roles.
Mistake 10: Blaming damage for a positioning failure
Players often change weapons after losing a fight that was actually caused by standing in the open, taking a predictable route, or fighting while already injured. Review the sequence before upgrading damage. If the enemy had the better angle, a stronger weapon may not change the result.
Pro Tips
Advanced players get the most from this build by treating sound, timing, and retreat routes as resources alongside ammunition and healing.
Tip 1. Prepare the second position before firing
Before opening on a Raider crossing between cover, identify where you will move after the shot. The trigger pull is only half the decision. A nearby wall, doorway, stairwell, or elevation change gives you a way to survive the enemy’s response.
Tip 2. Use machine noise as timing cover
When ARC activity becomes loud, use the disruption to reposition, reload, or cross a short exposed gap. Do not assume the noise makes you invisible, but recognize that overlapping sound can reduce how clearly enemies track your movement.
Tip 3. Start looting from the side of the body
Approaching a defeated player directly can expose you to the same angle that defeated them. Move in from a side that keeps nearby cover available, check the likely approach route, and stop looting immediately if new footsteps or machine audio appears.
Tip 4. Force close-range players to cross bad ground
When a rusher is moving toward you, do not retreat in a straight line through open space. Rotate around cover so they must choose between following into your secondary weapon’s range or taking a longer route that gives you time to heal and reposition.
Tip 5. Keep one ability for the extraction trigger
The final extraction sequence often creates predictable pressure because several players understand where everyone must go. Preserve a mobility or defensive tool until you are close enough that it can protect the crossing, revive, or final break from line of sight.
Tip 6. Change your route after a loud elimination
A successful kill can make your current area more dangerous than it was before. Other players may investigate, and ARC activity can compound the noise. Take the first safe rotation away from the fight before checking the best loot.
Tip 7. Let teammates stagger their utility
In a duo or trio, avoid throwing defensive tools simultaneously unless the squad is escaping immediate danger. Use the first tool to cross or stabilize, then keep the second for the next angle. Staggered utility extends the team’s safe movement window.
Tip 8. Use the secondary before the enemy is touching you
Switching early is better than trying to swap during a panic sprint or while trapped against a doorway. If audio confirms a close push, prepare the close-range weapon before the opponent appears.
Tip 9. Treat an empty backpack as tactical freedom
Open space is not wasted space when the raid objective is loot. It lets you choose valuable items quickly, abandon low-value clutter, and leave without spending time sorting your inventory while exposed.
Tip 10. Practice weapon transitions deliberately
The game tracks 50 achievements, including one requiring damage with four different weapons in the Practice Range, so the range is useful for more than aim warmups Source. Use it to compare how quickly you can move from your primary to your secondary, how each weapon behaves after sprinting, and which option remains controllable when you are under pressure.
FAQ
Is this ARC Raiders build good for solo players?
Yes, the all-rounder setup is particularly suitable for solo play because it includes a medium-range weapon, close-range protection, healing, information, and an escape option. A solo Raider cannot rely on a teammate to cover every weakness, so a flexible loadout is usually more reliable than a specialized one.
Solo players should be more selective with engagements. A duel against one isolated Raider may be manageable, but a fight near a machine patrol or a popular loot route can quickly become a multi-directional problem. Keep a retreat route open, avoid spending every gadget on the first exchange, and extract as soon as the run has delivered worthwhile loot.
Should I prioritize weapons or utility?
Prioritize the weapon you can control, then invest in utility that solves the problem causing your deaths. A stronger weapon is useful when you consistently lose clean damage trades, but utility is usually the better investment when you are getting trapped, third-partied, or forced to cross exposed ground.
For example, if you regularly damage an enemy but cannot finish them before their squad arrives, improve handling, ammunition reliability, or finishing pressure. If you die while rotating between buildings, choose mobility or defensive equipment. If you enter rooms without knowing whether they are occupied, information tools and slower approaches will likely provide more value than raw damage.
What should I bring on a budget run?
Bring a replaceable primary, a dependable close-range secondary, basic healing, and at least one tool for either information or escape. The budget version should let you practice the complete combat loop without risking the equipment you are still learning to use.
Avoid filling every backpack slot with ammunition or expensive utility. Leave room for loot, and decide before the raid whether your purpose is learning, gathering, completing an objective, or taking PvP fights. A cheap run with a clear goal is more useful than an expensive run where you panic after the first sound cue.
Is a close-range weapon better than a long-range weapon?
Neither is universally better; the close-range weapon protects the build’s main weakness, while the primary weapon determines how safely you can operate around open terrain. A close-range option is essential when enemies can push through doors, stairwells, or tight cover, but it should not replace a weapon that can contest medium-distance angles.
Choose the weapon you can use under stress. Test it against moving targets, practice swapping after sprinting, and notice whether you can maintain accuracy while retreating. The best pairing is the one that gives each weapon a distinct job rather than forcing both to compete for the same engagement distance.
How aggressive should this build be?
Play aggressively after you have created an advantage, not before. Good aggression means taking a shot from superior cover, pushing an isolated and weakened target, or rotating while the enemy is distracted by ARC activity. Bad aggression means chasing a target into unknown terrain, entering a building without a retreat, or continuing a fight after your healing and utility are gone.
A practical rule is to ask what improves if you push. If the push gives you a better angle, denies extraction, or removes the only enemy blocking your route, it may be justified. If it only gives you a chance at more loot that you do not need, leaving is usually the stronger play.
Can this build work in a trio?
Yes, but the trio should divide responsibilities instead of bringing three identical all-rounder kits. One player can carry stronger information tools, another can specialize in defensive cover, and the third can bring more direct pressure for finishing fights.
The all-rounder should remain the player who can rotate between roles. Watch the squad’s flanks, communicate when utility is available, and avoid spending every resource on the same target. A trio wins more consistently when one player is always prepared for the next angle rather than when all three players stand together and duplicate the same attack.
Related Guides
- ARC Raiders Beginner Tips
- Best ARC Raiders Weapons for New Raiders
- ARC Raiders Solo Extraction Guide
- ARC Raiders Duo and Trio Team Compositions
- ARC Raiders Loot Route Guide
- ARC Raiders PvP Positioning Guide
- ARC Raiders Extraction Survival Tips
- ARC Raiders Practice Range Guide
Sources
- ARC Raiders on Steam
- HowLongToBeat: ARC Raiders
- SteamHunters: ARC Raiders achievements
- Metacritic: ARC Raiders
See also
- ARC Raiders arc raiders update patch notes Explained
- ARC Raiders arc raiders october update Explained
- ARC Raiders upcoming updates: Hotfix 1.36.1 explained
- ARC Raiders update schedule: Hotfix 1.36.1 explained
- ARC Raiders Skill Tree Build Guide
- ARC Raiders Flashpoint Update Patch Notes Explained
- ARC Raiders Patch Notes Explained: Hotfix 1.36.1
- ARC Raiders Hotfix 1.36.1 Explained
- ARC Raiders Beginner Guide: Smart Starts, Core Systems, and Early Progress
- ARC Raiders Beginner Guide: How to Start Strong
스크린샷


검수
Arc Raiders Hub Editorial
전문 분야: Editorial team behind Arc Raiders Hub. Content is compiled from official patch notes, community wikis, and playthrough notes, then reviewed and updated on schedule.
출처
🔥 지금 뜨는 검색어

ARC Raiders 티어 리스트 무기 PvP
S/A/B 티어, 상성 포인트, 패치 맥락, 실수, 프로 팁까지 정리한 ARC Raiders PvP 최강 무기 가이드.
ARC Raiders PvP 티어 리스트: 플레이어 전투용 최고 무기
S티어 Venator와 Il Toro부터 강력한 A티어 대안까지, 매치업 팁과 패치 노트와 함께 ARC Raiders PvP 최고 무기를 확인하세요.
ARC Raiders 티어 리스트 무기: PvE 및 PvP 최고의 총기
Ferro, Kettle, Renegade, Stitcher, Rattler의 순위를 포함해 PvE와 PvP에서 최고의 ARC Raiders 무기를 확인하세요.
ARC Raiders arc raiders building a library 빌드 가이드
`Building a Library` 퀘스트를 위한 로드아웃, 우선순위, 카운터와 예산형부터 엔드게임까지의 공략을 안내합니다.
📋 패치 노트 해설
🛠️ 인기 도구
자주 묻는 질문
가이드 핵심 요약 · 질문을 클릭하면 펼쳐집니다.
Is this ARC Raiders build good for solo players?
Yes, the all-rounder setup is particularly suitable for solo play because it includes a medium-range weapon, close-range protection, healing, information, and an escape option. A solo Raider cannot rely on a teammate to cover every weakness, so a flexible loadout is usually more reliable than a specialized one.
Should I prioritize weapons or utility?
Prioritize the weapon you can control, then invest in utility that solves the problem causing your deaths. A stronger weapon is useful when you consistently lose clean damage trades, but utility is usually the better investment when you are getting trapped, third-partied, or forced to cross exposed ground.
What should I bring on a budget run?
Bring a replaceable primary, a dependable close-range secondary, basic healing, and at least one tool for either information or escape. The budget version should let you practice the complete combat loop without risking the equipment you are still learning to use.
Is a close-range weapon better than a long-range weapon?
Neither is universally better; the close-range weapon protects the build’s main weakness, while the primary weapon determines how safely you can operate around open terrain. A close-range option is essential when enemies can push through doors, stairwells, or tight cover, but it should not replace a weapon that can contest medium-distance angles.
How aggressive should this build be?
Play aggressively after you have created an advantage, not before. Good aggression means taking a shot from superior cover, pushing an isolated and weakened target, or rotating while the enemy is distracted by ARC activity. Bad aggression means chasing a target into unknown terrain, entering a building without a retreat, or continuing a fight after your healing and utility are gone.
Can this build work in a trio?
Yes, but the trio should divide responsibilities instead of bringing three identical all-rounder kits. One player can carry stronger information tools, another can specialize in defensive cover, and the third can bring more direct pressure for finishing fights.
이 가이드가 도움이 되었나요?
더 나은 가이드를 위해 평가해 주세요.
Share your own tip
Found something not in the guide? Submit it below — our editors review every tip before publishing. No account required.