 Arc Raiders
ARC Raiders Skill Tree Build Guide
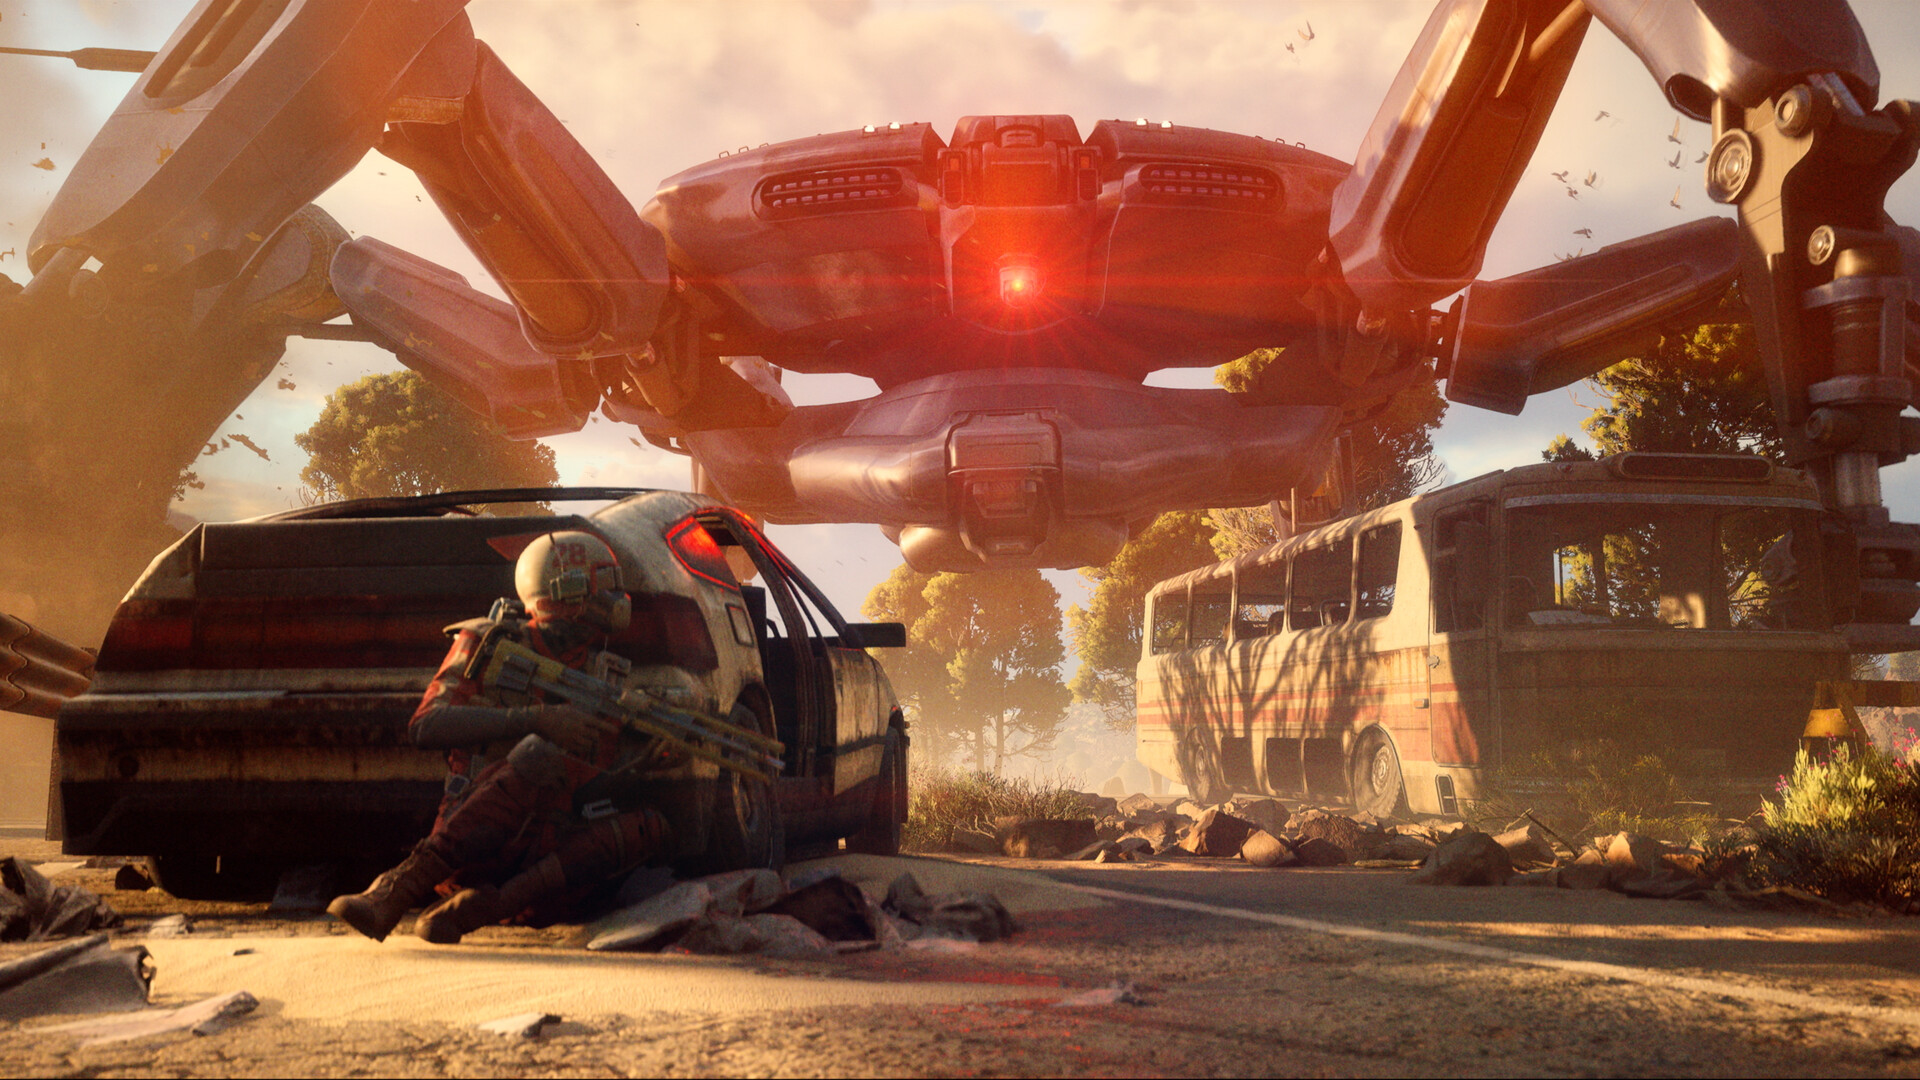
ARC Raiders is a multiplayer extraction adventure set on a lethal future Earth overrun by ARC, and it rewards players who can make clean decisions under pressure rather than just raw aim. The best arc raiders skill tree build is not the one that chases every combat perk; it is the one that keeps you moving, keeps your inventory safe, and lets you win the first 10 seconds of a fight before the enemy even realizes you have committed.
At a macro level, ARC Raiders is a game where information, route planning, and tempo matter as much as gun skill. With how long the game can run—HowLongToBeat lists 38.43 hours for the main story and 157.95 hours for completion Source—your skill choices should support consistency across many extractions, not just highlight-reel moments. The current critical reception is also strong, with a Metacritic critic score of 86/100 across 65 professional reviews Source, which is a good reminder that this is a system-driven shooter with enough depth to reward specialization.
Build Identity: Mobile Survivalist with Burst Control
This build is a rotational survivalist: a mid-risk, high-consistency setup for players who want to cross dangerous terrain, loot efficiently, and still have enough combat value to punish overextensions.
One-line pitch: move first, trade second, and win by turning every encounter into a favorable sequence rather than a fair duel.
What this build does best
- Fast map traversal to reduce time exposed in open lanes.
- Reliable first-contact advantage through better positioning and tighter pacing.
- Strong extraction consistency because it avoids overcommitting into bad fights.
- Flexible squad value in solo, duo, or trio play, which fits ARC Raiders’ team formats Source.
What it does not do
- It is not a pure damage-max build.
- It is not designed to brute-force every PvE cluster.
- It does not rely on a single “must-have” cooldown.
If you are coming from other extraction shooters, think of this as the build that wins by reducing mistakes. If you want a more aggressive variant, use this as your baseline and branch into your preferred combat specializations later. You can also pair this article with related guide on map routing once you are comfortable with the fundamentals.
Priority System: What to Level First
In an arc raiders skill tree build, your priority should follow the problems that kill runs most often: getting caught, getting pinned, getting out-cycled, and getting forced into bad loot decisions.
Stat and attribute priorities
- Mobility / movement efficiency
First priority because repositioning is the cleanest way to avoid damage and control sightlines. - Stamina economy / sustained action uptime
Lets you sprint, climb, slide, and disengage without stalling at the worst possible time. - Carry and recovery utility
Anything that improves looting tempo, inventory friction, or post-fight recovery is huge in extraction play. - Combat readiness
Useful, but only after your movement and survival tools are stable. - Specialized damage modifiers
These are best when your route and weapon choices are already consistent.
Why this order works
ARC Raiders is built around pressure management. If your build lets you choose the terms of engagement, you do not need to overinvest in raw damage early. That is especially important in a game with strong platform compatibility and a healthy player base, where you will regularly face confident players and organized squads. ProtonDB currently classifies the game as platinum and Steam Deck status is verified Source, which suggests the game is being played broadly and comfortably across supported setups—another reason to favor reliability over gimmicks.

Rotation Optimization: The Cleanest Skill Flow
The most efficient version of this build follows a simple loop:
- Scout the route
- Move to a favorable angle
- Take only low-risk engagements
- Reset before your stamina or position collapses
- Loot only after the area is stable
That sounds basic, but in practice the difference between a good and bad run is usually whether you start the fight on your own terms.
Recommended skill priority order
| Priority | Skill type | Why it comes first |
|---|---|---|
| 1 | Movement / traversal perks | They create fights you can accept and avoid fights you cannot win |
| 2 | Stamina sustain | Keeps your rotation alive across long crossings and extended chases |
| 3 | Utility or carry perks | Improves extraction value and lowers inventory downtime |
| 4 | Defensive combat perks | Lets you survive when the route breaks down |
| 5 | Offensive burst perks | Best used after your survival core is online |
Practical rotation rules
- Do not path straight into the loudest loot route every raid.
Use side rotations and commit only when the lobby state is favorable. - Spend stamina on position, not panic.
If you burn stamina to sprint in a straight line, you are paying for future vulnerability. - Reset after every meaningful trade.
Extraction shooters reward the player who can break contact cleanly. - Keep one “escape lane” in mind at all times.
Your build is only as good as your ability to leave a losing angle.
Gear and Loadout Recommendations
This build works best with weapons and tools that respect tempo. You want low-friction options that let you capitalize on movement advantages instead of forcing prolonged stand-and-deliver fights.
| Slot | Item | Reason |
|---|---|---|
| Primary weapon | Stable mid-range rifle or controllable carbine | Reliable for first-contact duels and flexible across open terrain |
| Secondary weapon | Close-range backup | Covers pushes, ambushes, and awkward building fights |
| Tactical / throwables | Utility grenades or displacement tools | Helps break holds, flush cover, or create extraction space |
| Mobility support | Anything that improves movement or stamina flow | Synergizes with the build’s core identity |
| Armor / defensive layer | Balanced defense rather than full greed | Lets you survive the one mistake that still happens in extraction games |
| Consumables | Healing and sustain items | Keeps you from losing momentum after minor chip damage |
Budget vs endgame variant
Budget starter version
- Use the most controllable weapon you already own rather than waiting for a “perfect” drop.
- Prioritize any early perk that improves movement or stamina over combat niche perks.
- Keep your throwable kit simple: one offensive tool, one escape tool.
- Wear the safest armor you can afford without slowing down your route.
Endgame version
- Swap into a more specialized primary once your route is consistent.
- Add perk synergies that reward precise disengages and repeat engagements.
- Upgrade utility so you can convert short advantages into safe extractions.
- Lean into higher-value support items once your inventory decisions become automatic.
The budget version exists to get you alive, not to look stylish. The endgame version exists to make your good habits more punishing. If you are still learning the map, stay on the starter path longer than you think you need to.
Buff Windows and Timing
The strongest players in ARC Raiders understand when a perk, heal, or mobility option is actually valuable. Timing beats raw stat value more often than people admit.
When to spend your “power window”
- Before crossing open ground if you expect long exposure.
- Right after you break line of sight to convert a disengage into a safe reset.
- At the start of a push, not halfway through it.
- During extraction pressure, when the lobby is most likely to force mistakes.
When to hold resources
- Do not spend your mobility tool just to cover a few meters if the next rotation is more dangerous.
- Do not heal too early if the enemy still has angle advantage.
- Do not burn your strongest utility before you know whether the target is isolated.
A good rule: if your next 15 seconds include uncertainty, keep at least one escape or tempo tool available. That single discipline wins more raids than marginal damage boosts.
APM and Input Bottlenecks
This build is forgiving for average mechanical players, but it becomes excellent when you reduce unnecessary inputs.
Common bottlenecks
- Over-looting under pressure
You spend time in menus when you should already be rotating. - Double-peeking the same angle
The second peek is often where you lose the exchange. - Stamina mismanagement
Many players sprint too much, then panic when the real chase starts. - Weapon swapping too late
If your secondary is for close quarters, swap before the threat is on top of you.
How to lower your input load
- Pre-decide your escape route.
- Build a default healing rhythm so you do not hesitate.
- Keep your most used utility on easy access.
- Simplify your weapon roles: one weapon for space, one for emergencies.
The goal is not to play faster for its own sake. The goal is to reduce the number of decisions you have to make while the fight is already happening. That is where the best extraction builds create value.
When to Deviate from the Optimal Line
No skill tree build survives contact with reality unchanged. You should deviate when the lobby, your squad, or your gear pool demands it.
Deviate if:
- You are consistently playing with a full squad and can rely on shared coverage.
- Your preferred weapon archetype rewards a different cadence.
- You are farming a specific objective and do not care about standard extraction safety.
- You are repeatedly dying to the same threat class and need a targeted counter.
Stay on the core plan if:
- You are solo.
- You are still learning map flow.
- You are extracting with moderate loot and cannot afford experimentation.
- You are playing into unpredictable players and want the most stable baseline.
The “optimal” path is only optimal if it matches the match state. In ARC Raiders, route quality and risk control matter more than theoretical min-maxing.
Counters and Hard Matchups
Every build has matchups that force it to change gears. For this setup, the biggest problems are the ones that deny mobility or punish predictable rotations.
What shuts this build down
- Hard-anchored enemy positions that control narrow approaches.
- Long-range overwatch that punishes open rotation routes.
- Crowded third-party scenarios where your reset space disappears.
- Heavy ARC pressure that forces you to spend movement tools defensively instead of proactively.
How to adapt
- Rotate wider instead of forcing the obvious path.
- Carry a tool that can break sightlines or create confusion.
- Stop taking ego duels from bad terrain.
- If the lobby is unusually active, value extraction timing over additional loot.
In other words, this build is countered by being predictable. The answer is not to become reckless; it is to become harder to read.
FAQ
Is this a good solo build?
Yes. In solo play, survival value goes up because you do not have teammates to cover bad transitions. This build’s mobility-first approach is especially strong when you must self-manage every decision.
Is the build still good in squads?
Yes, but you should shift slightly more toward utility and team support. In a duo or trio, your movement tools become even more valuable because they help your squad control the pace of engagements.
Should I prioritize damage early?
Usually no. Damage matters, but in an extraction shooter your first upgrades should make you harder to catch and easier to reposition. Once that foundation is set, combat perks become much more attractive.
What if I keep dying before I can loot?
That usually means your route is too direct or your stamina economy is too weak. Rework your rotation first, then your gear, then your aggression threshold.
Is there a “best” weapon for this build?
Not universally. The best weapon is the one that matches your movement timing and does not punish you for short windows of exposure. Controllable, flexible guns are usually the safest fit.
Can I use this build for late-game farming?
Yes, but the endgame version should be tuned harder toward utility efficiency and extraction consistency. The budget version gets you started; the endgame version turns stable raids into repeatable value.
You might also like
- ARC Raiders Best Build Guide
- ARC Raiders Beginner Guide: [arc raiders codes](/guides/arc-raiders-codes), Core Tips, and Early Progression
- ARC Raiders Beginner Guide: Smart Starts, Loot Priority, and Map Routing
- ARC Raiders Walkthrough: Complete arc raiders walkthrough
- Arc Raiders Shared Watch Event Guide and All Rewards for Beginners
Sources
- https://store.steampowered.com/app/1808500/
- https://howlongtobeat.com/?q=ARC%20Raiders
- https://www.metacritic.com/game/arc-raiders
- https://www.protondb.com/app/1808500
- https://en.wikipedia.org/wiki/ARC_Raiders
You might also like
- ARC Raiders How to Complete Paving the Way: Enelica Building Location
- Arc Raiders Expedition Guide: Rewards What's Reset and How to Register
- Arc Raiders Trophy Display Project Guide: All Materials and Rewards
- ARC Raiders Beginner Guide: Crafting Items and Weapons
- Arc Raiders Damage ARC enemies in the Red Lakes Beginner Guide
See also
- ARC Raiders Beginner Guide
- Arc Raiders Player Count 2026: Live Steam Charts & Peak
- ARC Raiders Beginner Guide: Where to Find Industrial Battery and Start Strong
- ARC Raiders Loot Guide: Crate Types and Rarity
- Arc Raiders Steam Charts: Concurrent Players & Trends
- Arc Raiders Beginner Guide: With a View Quest Walkthrough and Early Game Essentials
- ARC Raiders Tier List: Best Picks, Strong Builds, and Situational Choices
- Arc Raiders Beginner Guide: Cold Snap Patch Notes and Update Details
- ARC Raiders Beginner Guide: Your First Steps in ARC Raiders PvE
- Arc Raiders Beginner Guide: Getting Started, Priorities, and the Blue Gate Glitch Controversy
- ARC Raiders Beginner Guide: How to Start Strong and Claim the Free Nvidia Backpack Skin Emerald Wave
- Arc Raiders Beginner Guide: First Steps, Loot Priorities, and Survival Basics
- ARC Raiders How to Complete the Controlled Access Zone Puzzle: Beginner Guide
- Arc Raiders Weather Monitor System Project Guide: Rewards Locations and Tips for Beginners
- Arc Raiders Expedition Guide: How to Complete All Expedition Steps Rewards and Reset Details
See also
- ARC Raiders Beginner Guide: Arc Raiders Where to Get Rusted Gear - Guide
- ARC Raiders Beginner Guide: First Hour, Resources, and Common Mistakes
- ARC Raiders Beginner Guide: Start Strong and Learn the Core Loop
- Arc Raiders Where to Find Rusted Tools - Guide
- Arc Raiders Where to Find Fried Motherboard in Beginner Guide
- ARC Raiders Beginner Guide: Close Scrutiny, Assessors, and Arc Operations Explained
- ARC Raiders Beginner Guide: Mushroom Locations and Early Progression
- ARC Raiders Beginner Guide: How to Start Strong
- ARC Raiders Converging Paths Project Guide: How to Complete
- Arc Raiders Beginner Guide: Yellow Light Stick Blueprint - Wiki
- ARC Raiders Beginner Guide: Worth Your Salt Quest Walkthrough - Guide
- ARC Raiders Beginner Guide: Getting Started, Loot Priorities, and Water Filter Tips
- ARC Raiders Beginner Guide: Getting Through the First Hours
- ARC Raiders Beginner Guide: Arc Raiders Where to Get Mushrooms - Guide
- ARC Raiders Beginner Guide: Smart Start, Safe Progress, and Early Wins
Screenshots



Reviewed by
Arc Raiders Hub Editorial
Expertise: Editorial team behind Arc Raiders Hub. Content is compiled from official patch notes, community wikis, and playthrough notes, then reviewed and updated on schedule.
Sources
Related Guides

%27/><stop offset=%271%27 stop-color=%27hsl(320,50%,18%)%27/></linearGradient></defs><rect width=%27460%27 height=%27215%27 fill=%27url(%23g)%27/><text x=%27230%27 y=%27115%27 text-anchor=%27middle%27 font-family=%27sans-serif%27 font-size=%2724%27 font-weight=%27700%27 fill=%27rgba(255,255,255,0.85)%27>App 1808500</text><text x=%27230%27 y=%27142%27 text-anchor=%27middle%27 font-family=%27sans-serif%27 font-size=%2711%27 fill=%27rgba(255,255,255,0.6)%27>no image yet</text></svg>)


🔥 Popular Guides

ARC Raiders patch notes security breach reddit: Store Update 1.43.0 Explained
Store Update 1.43.0 adds Roamer Set, Phantom Targets, and a security breach locker nerf explained.
arc raiders patch notes reddit: Patch Notes Explained for Store Update 1.43.0
ARC Raiders Store Update 1.43.0 adds the Roamer Set and Phantom Targets Event. What changed, who benefits, and what to do now.
ARC Raiders Patch Notes January: Patch Notes Explained
January ARC Raiders patch notes explained: new Roamer Set, Phantom Targets event, what changed, who benefits, and what to do next.

Arc Raiders 10 biggest regrets of a players wish i knew sooner: Beginner Guide
Beginner tips for Arc Raiders, including first-hour priorities, resource planning, common mistakes, and when you are no longer a beginner.
📋 Patch Notes & Updates
🛠️ Popular Tools
Frequently Asked Questions
Quick answers from the guide · click a question to expand.
Is this a good solo build?
Yes. In solo play, survival value goes up because you do not have teammates to cover bad transitions. This build’s mobility-first approach is especially strong when you must self-manage every decision.
Is the build still good in squads?
Yes, but you should shift slightly more toward utility and team support. In a duo or trio, your movement tools become even more valuable because they help your squad control the pace of engagements.
Should I prioritize damage early?
Usually no. Damage matters, but in an extraction shooter your first upgrades should make you harder to catch and easier to reposition. Once that foundation is set, combat perks become much more attractive.
What if I keep dying before I can loot?
That usually means your route is too direct or your stamina economy is too weak. Rework your rotation first, then your gear, then your aggression threshold.
Is there a “best” weapon for this build?
Not universally. The best weapon is the one that matches your movement timing and does not punish you for short windows of exposure. Controllable, flexible guns are usually the safest fit.
Can I use this build for late-game farming?
Yes, but the endgame version should be tuned harder toward utility efficiency and extraction consistency. The budget version gets you started; the endgame version turns stable raids into repeatable value.
Was this guide helpful?
Rate this guide so we can improve it.
Share your own tip
Found something not in the guide? Submit it below — our editors review every tip before publishing. No account required.