 Arc Raiders
ARC Raiders arc raiders beginner loadout Build Guide
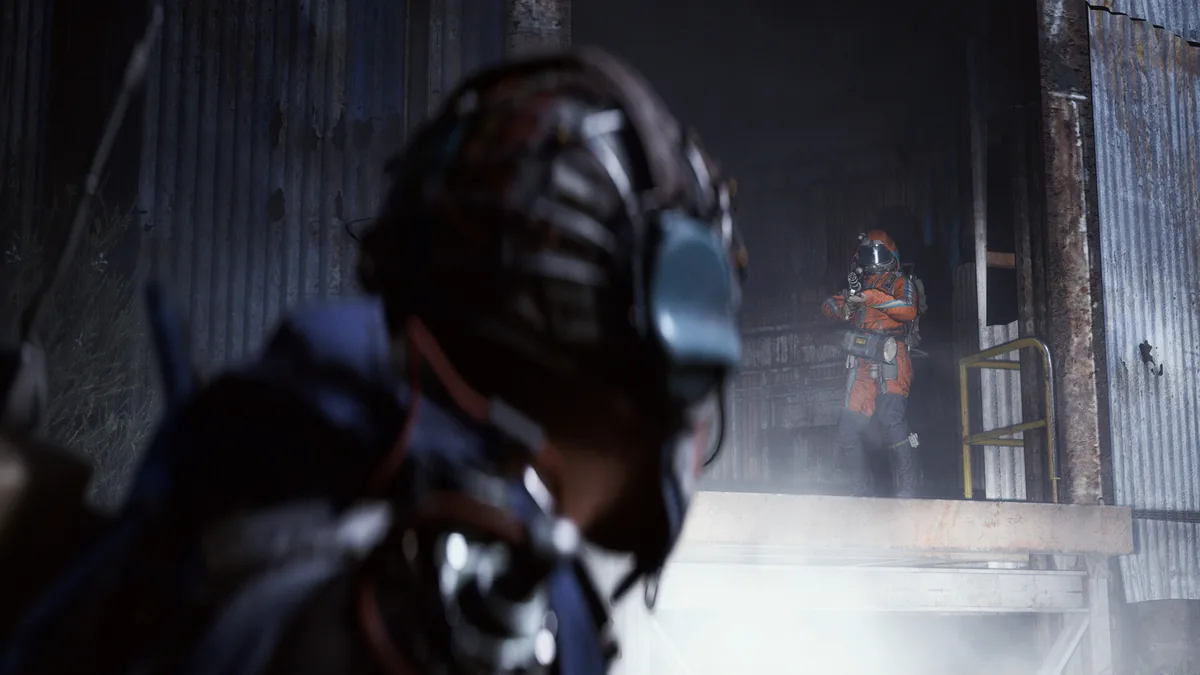
Quick Answer: The best arc raiders beginner loadout is a flexible survival kit that prioritizes escape, low-recoil weapons, healing, and utility so you can learn extraction timing, fight ARC safely, and leave with loot consistently.
Build Identity: The Safe, Flexible Extraction Runner
This build is a survivability-first loadout for new Raiders who want to learn the game without getting punished every time a fight gets messy. ARC Raiders is a multiplayer extraction adventure set in a lethal future Earth, and that matters because your gear choice should help you survive both ARC pressure and player ambushes rather than chase flashy damage alone. The whole point of this beginner setup is to give you a stable “win condition”: survive the contact, get your loot out, and build confidence with each successful raid.
Think of this as a cautious, adaptable scavenger build. You are not trying to be the loudest player in the match, and you are not building around perfect duels. Instead, you are setting yourself up to handle common early situations like a Drone patrol at mid-range, a sudden run-in with another Raider at a supply point, or a bad rotation where you need to disengage and heal. That makes it especially useful for solo play, but it also works well in duo and trio groups where one player needs to stay alive long enough to support the team’s extraction.
The most important mindset shift for a newcomer is that extraction shooters reward consistency more than highlight plays. In ARC Raiders, a “good” raid is often the one where you avoid an unnecessary fight, leave with materials, and bank progress. This beginner loadout supports that style by keeping your weapon handling simple, your utility straightforward, and your decisions low-risk. If you are just getting started, it is better to carry a reliable gun with manageable recoil than to gamble on a high-skill weapon you cannot control under pressure.
For players searching specifically for an arc raiders beginner loadout, this guide leans into the practical side of the game: what to equip, what to value on your gear, when to engage, and how to recover when things go wrong. The build is also a strong baseline for learning enemy behavior, from ARC patrol routes to the moments when another squad is most likely to push. Once those fundamentals click, you can branch into more aggressive loadouts, but this one gives you the safest first step.
Stat and Attribute Priorities
These are the stat and attribute priorities for the beginner extraction build, ordered from most important to least important based on how often they save a raid.
- Survivability / Health Economy — More effective health, better recovery, or anything that helps you stay alive after the first mistake matters most because beginners are most vulnerable during the first bad trade.
- Mobility / Stamina Efficiency — Fast movement and strong stamina usage help you reposition, disengage, and reach extraction before a third party arrives.
- Weapon Stability / Recoil Control — A stable gun lets you land consistent shots on ARC drones and Raider targets without overcorrecting.
- Inventory / Carry Flexibility — Extra room for materials, ammo, and mission loot reduces the need to leave valuable items behind.
- Utility Efficiency — Better value from heals, grenades, or support tools keeps your kit useful even when your primary weapon is not ideal.
A newcomer should treat these priorities as a survival ladder. First you want to avoid dying, then you want to control movement, then you want to make your shooting reliable, and only after that do you start optimizing for loot density or niche utility. In extraction games, players often make the mistake of building for damage first, but damage only matters if you are alive, positioned well, and able to actually finish the fight. A low-skill player with decent mobility and a stable weapon usually performs better than a glass-cannon loadout with stronger theoretical burst.
Here is a simple way to think about stat choices in practice:
- If you are getting caught in bad fights, prioritize survivability tools.
- If you are almost escaping but running out of stamina, prioritize mobility.
- If ARC enemies are surviving too long, prioritize stability and controllable damage.
- If you keep leaving with full pockets and no space, prioritize carry flexibility.
- If you are using too many consumables for too little gain, prioritize utility efficiency.
That order also matches the way most beginners learn the game. Early on, you will spend more time escaping than executing perfect fights. For example, a player who gets jumped by a Raider near a loot objective needs enough movement and healing to break line of sight. Another player fighting an ARC patrol in the open needs a gun that stays accurate while they strafe. A third player may be safe in the moment but unable to extract because their inventory is overloaded with mixed materials. Each situation points back to the same theme: stability first, greed second.
If your gear offers trade-offs, choose the version that makes your raid simpler rather than stronger on paper. A moderate boost to movement is often more valuable than a niche damage perk, especially while you are still learning map flow and enemy audio cues.
You might also like
- ARC Raiders Tier List Weapons PvP
- ARC Raiders Best ARC Raiders Skill Tree Build
- ARC Raiders weapon tier list
- ARC Raiders Tier List Weapons: Best Guns for PvE and PvP
- ARC Raiders Tier List PvP: Best Weapons for Player Fights
Skill Rotation and Ability Priority
Your ability priority should always start with escape tools, then healing or sustain, then damage boosters if your build has them.
Because ARC Raiders is designed around shifting survival situations rather than fixed raid lanes, your “rotation” is less about a rigid combo and more about a decision order. In practice, you want to know what to press first when things go wrong, what to save for a real emergency, and what to ignore unless the fight is already under control. That is especially true in a beginner loadout, where the goal is to reduce panic and make your reactions repeatable.
A simple priority flow looks like this:
- Create distance first. If you are being pushed by another Raider or pressured by ARC, your first job is to stop taking clean damage.
- Break line of sight. Use cover, elevation, or terrain to force enemies to reposition.
- Heal or stabilize. Only commit to recovery once you are no longer exposed.
- Re-engage only if the fight is favorable. Return fire when the enemy has to reload, heal, or move.
- Extract if the raid state is bad. If you are low on resources and your objectives are already complete, leaving is the correct play.
This priority chain works because beginners often overvalue the moment they can shoot. In reality, the most important part of a fight is often the second before the bullets start flying. For example, if a Drone patrol sees you while you are looting, the best response is not to stand still and trade damage. You want to move behind hard cover, re-center your aim, and only then take measured shots. If another Raider starts pressuring you at a building edge, the right move is usually to disengage through a side route instead of trying to brute-force the duel.
A table can help make the order clearer:
| Priority | What to Use | When to Use It | Why It Matters |
|---|---|---|---|
| 1 | Movement / escape tool | First sign of a bad angle, third-party pressure, or open-ground exposure | Stops immediate damage and buys decision time |
| 2 | Cover and repositioning | After breaking sight or crossing dangerous space | Makes the enemy spend time reacquiring you |
| 3 | Healing / sustain | When you are safe enough to stop moving aggressively | Restores raid value and prevents snowball deaths |
| 4 | Primary weapon fire | When the target is exposed, isolated, or distracted | Conserves ammo and improves hit quality |
| 5 | Utility damage / pressure | When the target is pinned or grouped | Converts advantage into a safe finish |
If your loadout includes anything like a throw, trap, or special utility, do not treat it as your opener unless you already have a positional advantage. Beginner players often waste valuable tools at the start of a fight and then have nothing left when the enemy counters. A better habit is to use utility to punish movement, not to start a risky fair trade.
Recommended Gear and Loadout Table
This loadout works best when built around a simple weapon, dependable healing, and one or two utility pieces that help you escape or finish weak targets.
The exact named items available to you can vary by progression and what you have unlocked, so the most useful way to present the beginner setup is by slot and function. The table below shows the kind of gear you should aim for in an arc raiders beginner loadout, along with the reason each slot matters. If you have multiple options, choose the one that is easiest to control, cheapest to replace, and least punishing when you miss.
| Slot | Item Type | Reason |
|---|---|---|
| Primary Weapon | Easy-to-control rifle or SMG | Lets you fight ARC drones and Raiders without fighting the recoil pattern more than the enemy |
| Secondary Weapon | Backup sidearm or lightweight backup gun | Covers you when the main weapon is empty, jammed, or out of effective range |
| Healing Slot | Fast-use healing item | Keeps you alive after the first mistake and lets you recover between fights |
| Utility Slot 1 | Escape or reposition tool | Helps you disengage, cross dangerous ground, or survive a third-party push |
| Utility Slot 2 | Grenade, lure, or pressure tool | Gives you a way to punish enemies behind cover or force movement |
| Armor / Defensive Slot | Basic protective gear | Raises your margin for error and reduces the chance of getting deleted by a surprise burst |
| Backpack / Carry Slot | Flexible storage option | Keeps room for loot so you do not have to leave early with a full bag |
| Consumables | Ammo and extra sustain | Prevents you from getting stranded mid-raid with no resources |
For a practical beginner setup, think in terms of use cases rather than item rarity. A simpler rifle that you can land shots with is better than an advanced weapon you cannot handle under stress. The same logic applies to healing: if you keep forgetting to use a complicated item, a straightforward heal is often stronger for you than a theoretically more efficient one. Utility should also be chosen for reliability. One tool that clearly helps you escape is worth more than three niche items you barely remember to use.
Two good examples of how this plays out:
- In a solo raid, a controllable rifle plus one emergency escape tool lets you break contact from both ARC and human opponents.
- In a duo, one player can carry a stable mid-range weapon while the other focuses more on utility and support, but both still need enough healing to survive a bad angle.
If you are unsure whether to spend on offense or defense, lean defensive. Beginner progress in extraction games comes from repeated successful extractions, not from occasionally winning a flashy fight. A balanced loadout also teaches better habits because it rewards good positioning and punishes reckless aggression in a way that is easy to understand.
Budget vs Endgame Variant
The budget version uses cheap, replaceable gear that is easy to learn with, while the endgame version swaps in higher-consistency tools that reduce downtime and sharpen your extraction rate.
This is where the build becomes especially useful for players who are still collecting resources. A budget setup should be simple enough that losing it does not feel catastrophic. An endgame setup should keep the same core idea but remove awkward trade-offs. That means both variants should play similarly: stable gun, solid healing, useful escape tool, and enough carry room to profit from a raid.
Here is the clean comparison:
| Category | Budget Starter Substitutes | Endgame Variant | Why the Upgrade Matters |
|---|---|---|---|
| Primary Weapon | Basic low-recoil rifle or starter SMG | Higher-consistency rifle or optimized automatic weapon | Better range control and easier follow-up shots |
| Secondary Weapon | Whatever you can replace cheaply | Backup with better handling or stronger close-range threat | Gives you a safer answer when pushed indoors |
| Healing | Standard fast-use heal | More efficient sustain option if available | Lets you recover more often without burning through supplies |
| Utility | One simple escape tool | Better movement or denial utility | Increases survivability against organized pressure |
| Armor | Basic protection | More reliable defensive gear | Expands your margin for error in surprise fights |
| Backpack | Small or mid-tier carry option | Larger, more efficient storage option | Supports longer raids and better loot extraction |
| Ammo / Consumables | Minimal viable stack | Comfortable reserve for extended raids | Prevents running dry during chained engagements |
For budget play, the biggest mistake is trying to imitate an endgame build too early. A beginner who buys expensive pieces but cannot use them well usually ends up with less value than a player using plain gear intelligently. Your starter goal is not to maximize efficiency; it is to stay alive long enough to learn. That is why a cheap rifle, basic healing, and a single clear escape option are enough to carry you through the early game.
Once you have more confidence, the endgame version should not change your identity. It should simply improve your consistency. For example, a better weapon may make it easier to finish a Drone before it calls attention, a stronger heal may let you recover after a bad rotation, and a larger backpack may let you leave with more salvage after a successful sweep. None of those changes require you to play differently. They just reward the same good habits more reliably.
If you are deciding where to spend first, upgrade in this order:
- Weapon handling
- Healing reliability
- Escape utility
- Carry space
- Armor quality
That order keeps your build focused on survival instead of greed. The more comfortable you become with fights, the more you can gradually trade budget pieces for stronger ones without changing the overall plan.
Counters and Hard Matchups
This build struggles most when enemies force fast, close-range, or multi-angle fights that deny you time to stabilize.
A beginner survival loadout is strong against uncertainty, but it is weaker when opponents remove the time and space you need to think. The most dangerous matchups are not always the strongest enemies; they are the ones that compress decision-making. In ARC Raiders, that usually means being pinned in open terrain, getting pushed by another Raider while ARC is already active nearby, or taking a fight in a cramped area where your mobility and positioning matter less than raw reaction speed.
Common hard matchups include:
- Aggressive Raider teams that collapse on sound cues and push before you can heal.
- Open-ground ARC pressure where drones or heavier threats keep you from reaching cover.
- Indoor or hallway fights where your low-risk rotation gets denied by short sightlines.
- Third-party arrivals that punish long engagements and force you to split attention.
- Resource-starved raids where your healing and ammo reserve are too low to continue after the first fight.
The way to adapt is to stop thinking of the build as a duelist and start treating it like a control-and-escape setup. If you are facing a human squad, do not commit to a straight trade unless you already have a positional edge. Instead, use cover to separate them, force them to enter one at a time, or simply disengage and rotate to a different objective. If ARC enemies are making the area unsafe, clear only what blocks your path and leave the rest. The goal is to reduce contact, not to fully clear the map.
A few concrete examples make this easier to apply:
- If a Raider team corners you near a loot point, cut through a side route rather than trying to outshoot three angles at once.
- If a Drone patrol keeps you exposed, retreat behind hard cover and re-engage only after the patrol path opens up.
- If you are low on healing and hear footsteps, prioritize extraction over another loot stop unless the reward is clearly worth the risk.
This build is also vulnerable when the player gets greedy. Beginners often stay in a fight too long because they have already “invested” damage or consumed utility, but extraction games punish sunk-cost thinking. If the fight no longer favors you, leave. The earlier you accept that, the stronger this loadout becomes.
The biggest adaptation is mental: use your loadout to win the raid, not every skirmish. Winning the raid means preserving your health, your ammo, and your momentum for the moment that matters most, which is usually the extraction path.
Common Mistakes
These are the most common mistakes players make with an arc raiders beginner loadout, why they happen, and how to fix them.
Overbuilding for damage
- Players want to feel powerful, so they pick the hardest-hitting option they can find.
- This usually happens because damage numbers are easier to understand than survival value.
- Fix it by choosing the easiest weapon to control and only upgrading damage once your survival rate is steady.
Ignoring escape tools
- New players often treat mobility or repositioning items as optional.
- They fall into this trap because escape tools do not look exciting until the moment they save a raid.
- Fix it by always reserving one slot for a way out, especially if you play solo.
Healing too late
- Players wait until they are nearly dead before using recovery.
- This happens because they want to “save” resources and keep fighting.
- Fix it by healing right after you break line of sight, before you re-peek.
Taking fair fights in open ground
- Beginners stand in the open and trade shots as if every fight is a duel arena.
- They do this because moving and resetting feels like giving up.
- Fix it by using cover, terrain, and rotation to create uneven fights in your favor.
Looting too long after a fight
- Players stay on the body or container too long and get punished by a third party.
- This happens because loot is the visible reward, while the danger is delayed.
- Fix it by looting quickly, then relocating before you sort inventory.
Spending the whole raid at low resources
- Some players try to “save” ammo and healing, then end up underprepared when a real threat appears.
- They do this because they fear wasting supplies on a run that may fail anyway.
- Fix it by using enough resources to secure the raid and leaving with profit rather than hoarding items you never spend.
Forgetting the extraction goal
- New players keep exploring after they already have enough loot.
- This happens because curiosity feels productive in a big map.
- Fix it by setting a clear exit condition: once your bag is good and your health is low, head out.
These mistakes are important because they are not really gear problems. They are decision problems. A beginner loadout works best when it is paired with disciplined choices, and most losses come from overconfidence, impatience, or greed rather than from the item list itself.
Pro Tips
These tips go beyond the obvious and help the beginner build perform more like a veteran setup.
Tip 1. Fight for exits, not for every objective
If you already have decent loot, stop taking side fights on the route to extraction unless they are clearly favorable. A successful escape is worth more than a risky extra kill, especially when you are still learning map pressure and third-party timing.
Tip 2. Use sound as a threat detector
If you hear combat nearby, treat it as a warning that the area is about to become unstable. Move as though another squad could arrive at any moment, because in extraction games that is often exactly what happens.
Tip 3. Reposition after every reload window
The moment your weapon is empty or your fight briefly pauses is the best time to move. Beginners often stand still to “reset,” but a short rotation to a new angle can force the enemy to re-aim and give you the first clean shot.
Tip 4. Save utility for forced movement
Throwables, traps, or pressure tools are most valuable when enemies have to cross a gap, flank a door, or leave cover. Use them when the target’s path is predictable, not when they are already safe and stationary.
Tip 5. Keep one mental rule for every raid
Choose one rule such as “never fight in the open” or “always heal after breaking sight,” and follow it until it becomes automatic. Simple rules reduce hesitation and make your decision-making sharper under stress.
Tip 6. Learn when to disengage from ARC and from Raiders separately
A lot of beginners panic when both threats appear at once. The key is to decide which one is the immediate danger. If a player is actively pushing, break that angle first. If ARC pressure is forcing you into the open, solve the pathing problem first. Not every enemy deserves equal attention.
FAQ
Is this build good for solo play?
Yes, this build is especially good for solo play because it emphasizes escape, stability, and low-risk decisions instead of relying on team support.
Should beginners use the most powerful weapon they can find?
Usually no, because the strongest weapon on paper is not always the best weapon for learning. A controllable gun that you can aim well is more valuable than a flashy option you cannot manage under pressure.
What should I prioritize if my inventory is always full?
Prioritize carry flexibility and make a habit of leaving with the raid earlier. A full bag only matters if you can actually extract with it.
Can this loadout work in duos or trios?
Yes, it works well in groups because one player can focus on stability and survivability while teammates cover additional angles and pressure.
What is the biggest mistake with beginner loadouts?
The biggest mistake is chasing damage before survival. If you cannot stay alive long enough to use your gear, the loadout never gets to do its job.
Related Guides
- ARC Raiders beginner tips
- Best early-game weapons in ARC Raiders
- ARC Raiders solo survival guide
- ARC Raiders duo team loadout guide
- ARC Raiders extraction and escape guide
- ARC Raiders healing and sustain guide
- ARC Raiders PvE ARC enemy guide
- ARC Raiders loot route planning guide
Sources
- https://store.steampowered.com/app/1808500/
- https://howlongtobeat.com/?q=ARC Raiders
- https://www.metacritic.com/game/arc-raiders
- https://api.steambase.io/games/1808500
- https://www.protondb.com/app/1808500
See also
- ARC Raiders Riven Tides Update Patch Notes Explained
- ARC Raiders arc raiders building a library Build Guide
- ARC Raiders update new map: Hotfix 1.36.1 Explained
- ARC Raiders arc raiders update patch notes Explained
- ARC Raiders Beginner Tips: A Complete Beginner Guide
- ARC Raiders Build Guide: The Versatile Raider Loadout
- ARC Raiders arc raiders october update Explained
- ARC Raiders upcoming updates: Hotfix 1.36.1 explained
- ARC Raiders update schedule: Hotfix 1.36.1 explained
- ARC Raiders Skill Tree Build Guide
Screenshots


Geprüft von
Arc Raiders Hub Editorial
Fachgebiet: Editorial team behind Arc Raiders Hub. Content is compiled from official patch notes, community wikis, and playthrough notes, then reviewed and updated on schedule.
Quellen
🔥 Aktuell im Trend
ARC Raiders arc raiders patch notes console Erklärt: Die 5. Expedition
Die 5. Expeditions-Update erklärt: optionaler Quest-Reset, längeres Abreisefenster, kein Last Call und was Console-Spieler als Nächstes tun sollten.
arc raiders patch notes bettina: Die 5. Expedition erklärt
ARC Raiders’ The 5th Expedition ändert die Reset-Regeln, verlängert das Zeitfenster und beeinflusst die Bettina-Progression.
ARC Raiders arc raiders steam deck update: Die 5. Expedition erklärt
Die 5. Expedition Patch erklärt, inklusive Opt-out für Quest-Resets, längerem Abreisefenster und was Spieler heute ändern sollten.
ARC Raiders bester Skilltree-Build für ARC Raiders
ARC Raiders PvE-Skilltree-Guide mit Prioritäten, Loadouts, Countern und Budget-bis-Endgame-Pfad für sicherere Extractions.
📋 Patch Notes erklärt
🛠️ Beliebte Tools
Häufig gestellte Fragen
Schnelle Antworten aus dem Guide · Frage anklicken zum Aufklappen.
Is this build good for solo play?
Yes, this build is especially good for solo play because it emphasizes escape, stability, and low-risk decisions instead of relying on team support.
Should beginners use the most powerful weapon they can find?
Usually no, because the strongest weapon on paper is not always the best weapon for learning. A controllable gun that you can aim well is more valuable than a flashy option you cannot manage under pressure.
What should I prioritize if my inventory is always full?
Prioritize carry flexibility and make a habit of leaving with the raid earlier. A full bag only matters if you can actually extract with it.
Can this loadout work in duos or trios?
Yes, it works well in groups because one player can focus on stability and survivability while teammates cover additional angles and pressure.
What is the biggest mistake with beginner loadouts?
The biggest mistake is chasing damage before survival. If you cannot stay alive long enough to use your gear, the loadout never gets to do its job.
War dieser Guide hilfreich?
Bewerte diesen Guide, damit wir ihn verbessern können.
Share your own tip
Found something not in the guide? Submit it below — our editors review every tip before publishing. No account required.